
Authentication
Generate API key
API keys belong to your partner organization, not to an individual client, and any member of the organization can create or delete them. Generate one in the Management Platform before making a request.
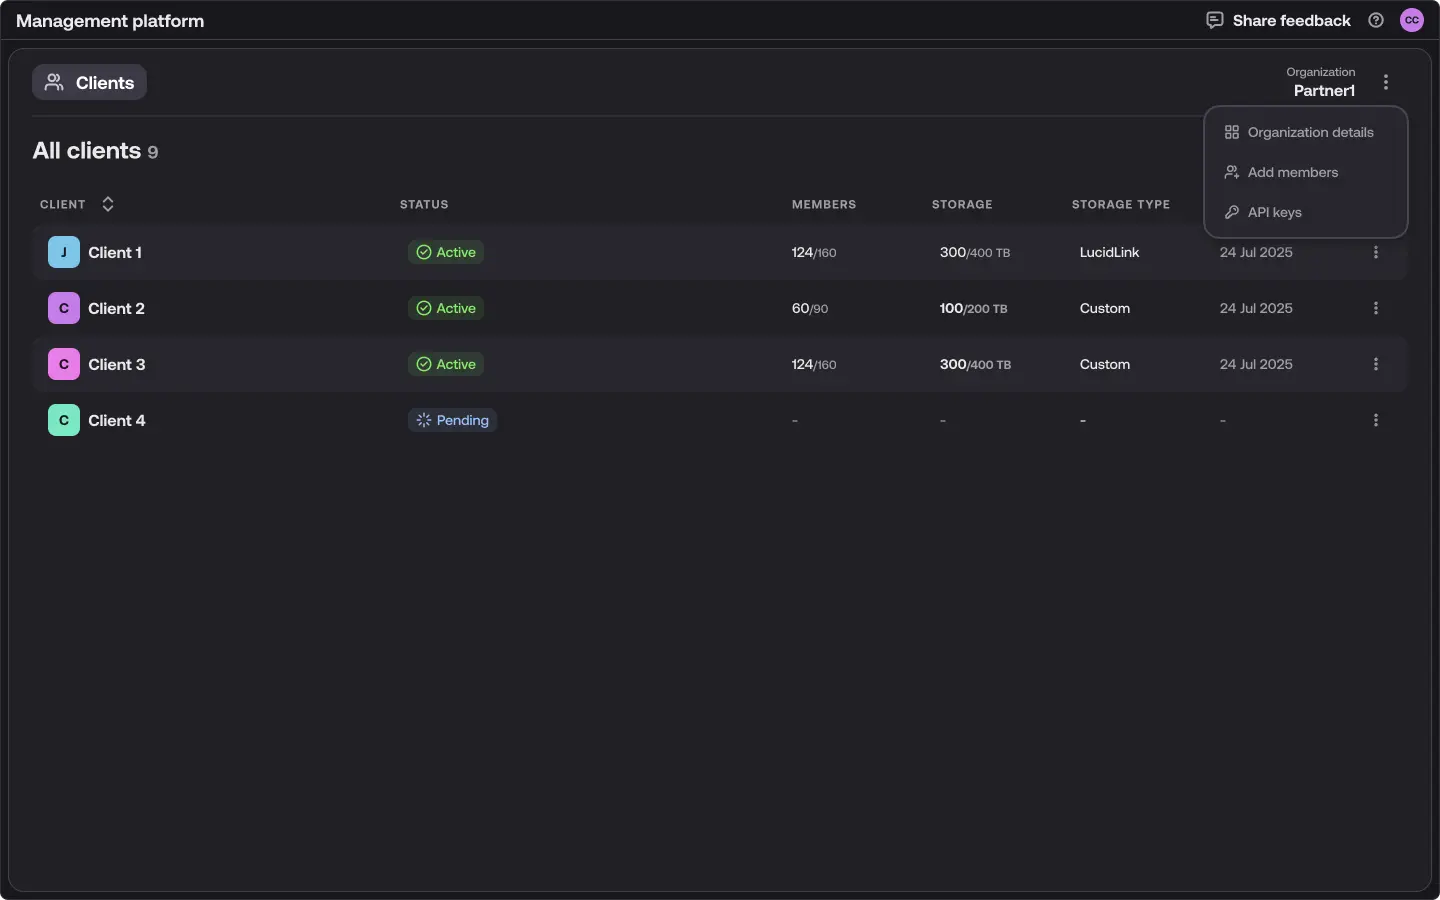
1. Open the API keys screen
On the Clients screen, open the overflow menu next to your organization name in the top right and select API keys.
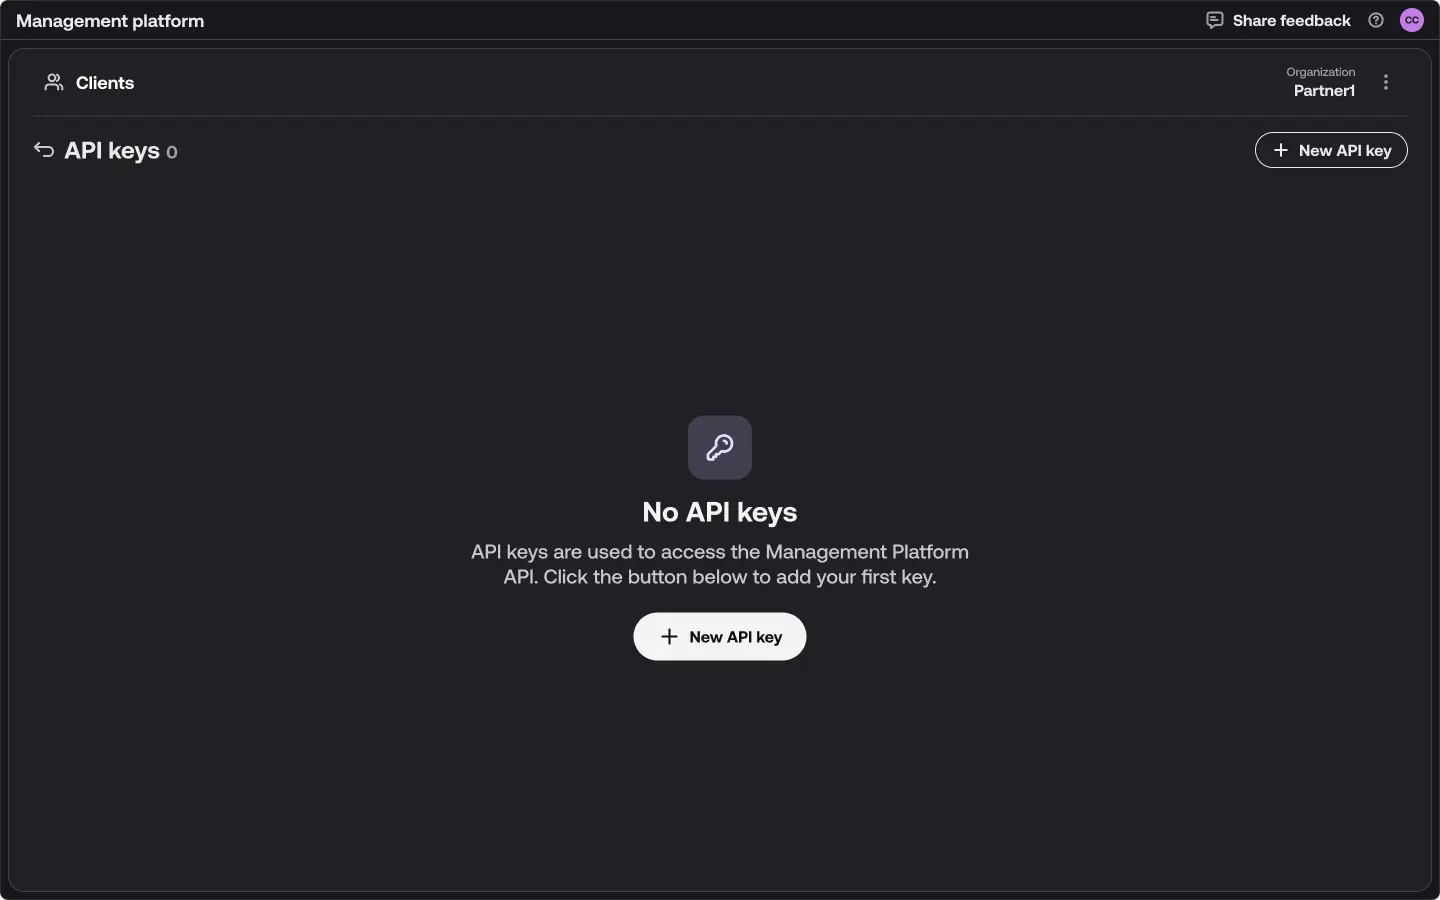
2. Add your first key
An organization with no keys shows an empty state. Select New API key, either in the centre of the empty state or from the button in the header.
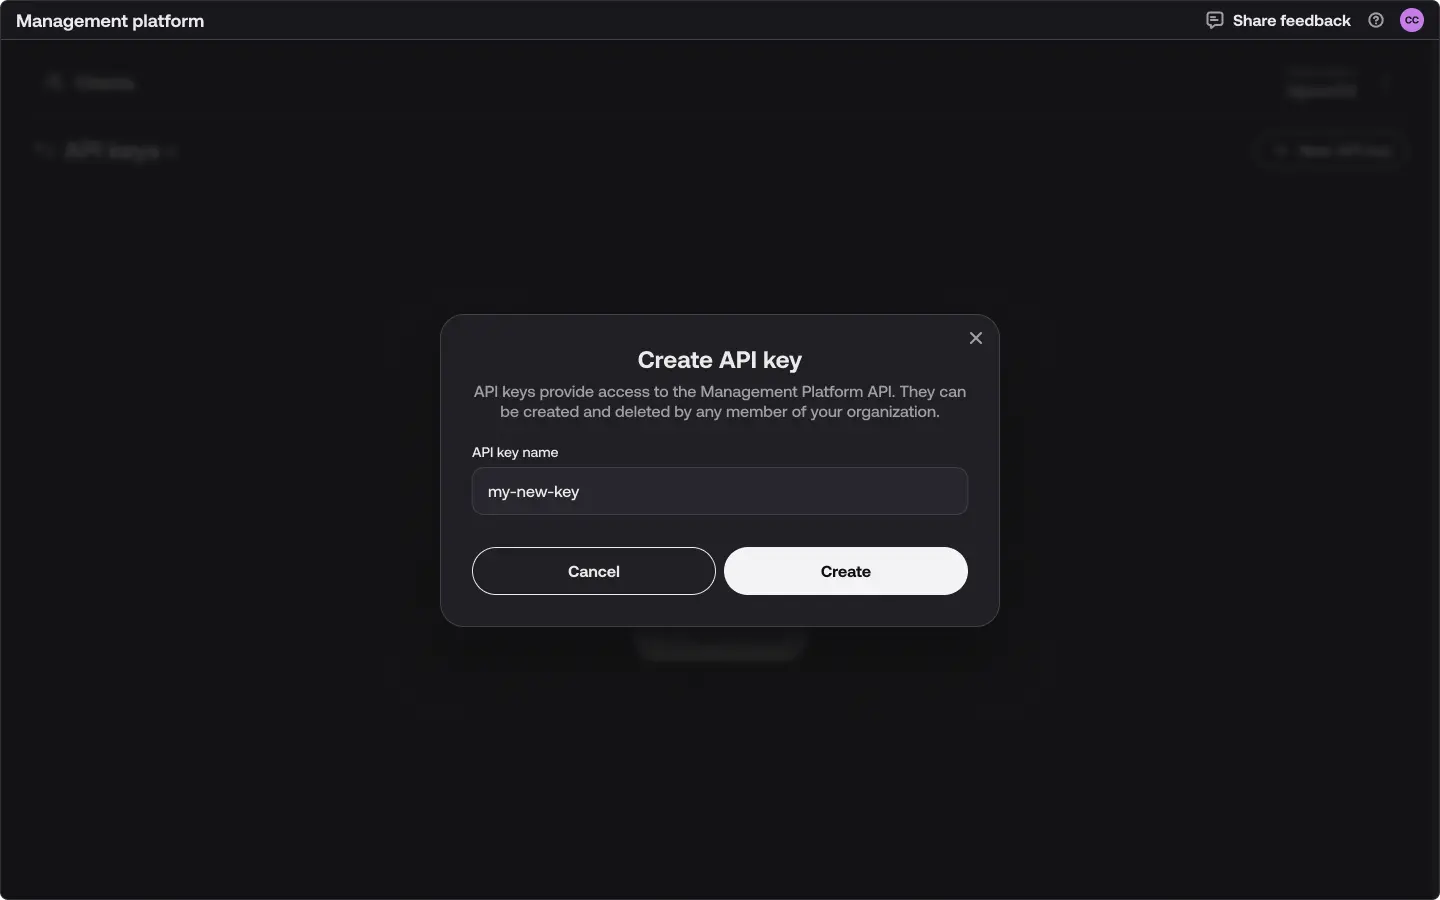
3. Name the key
Give the key a name that identifies where it will be used. Because every member of the organization sees the same list, a descriptive name makes it clear which integration a key belongs to. Select Create.
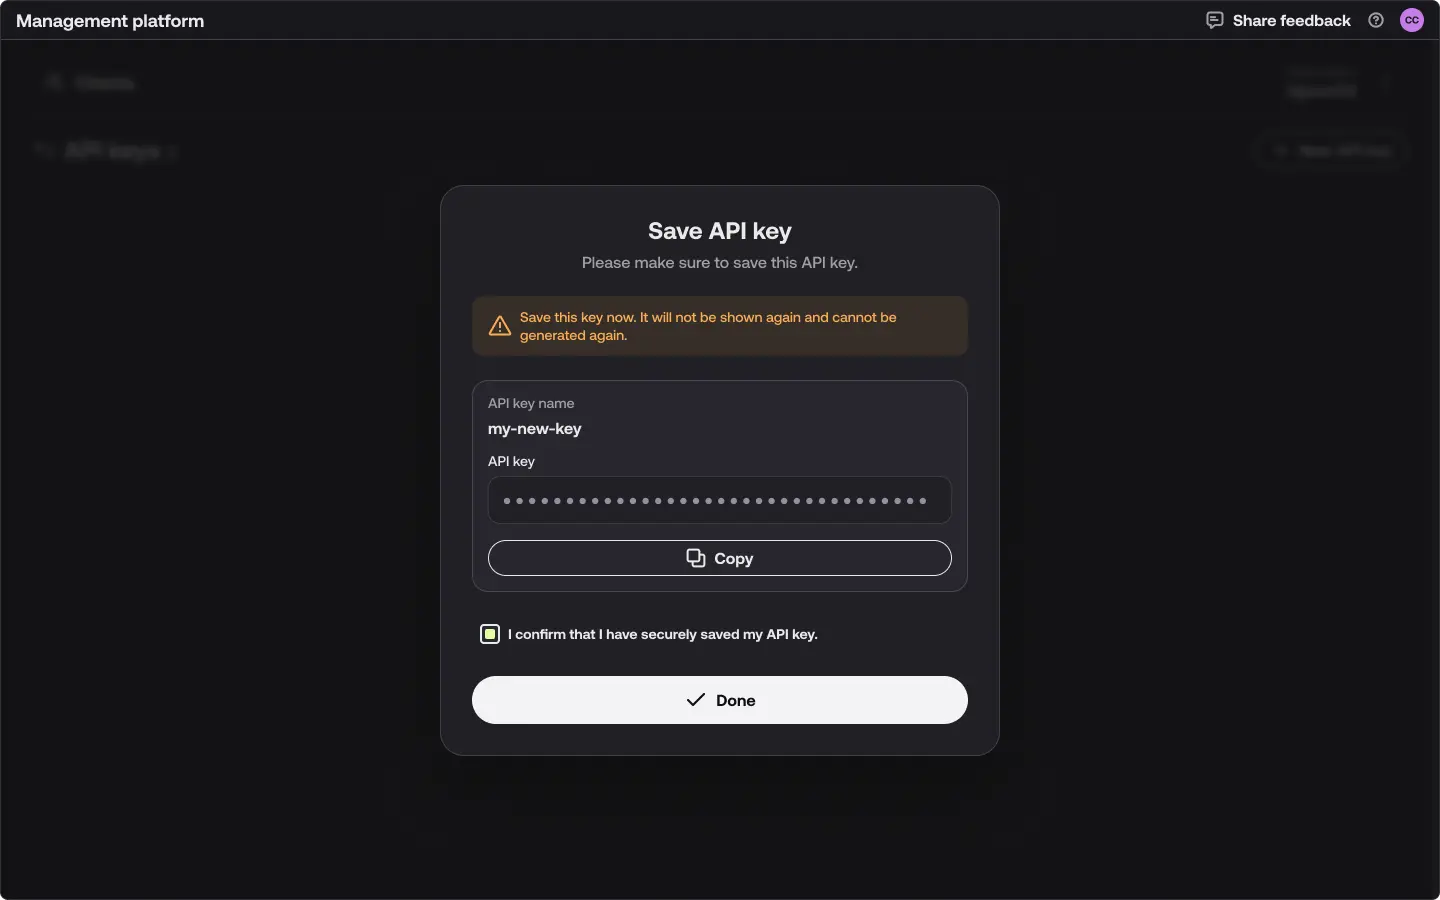
4. Copy the key
The full key is displayed once. Copy it and store it in your secret manager, then tick the confirmation checkbox and select Done.
This is the only time the key is shown. It cannot be retrieved or regenerated afterwards — if you lose it, delete the key and create a new one.
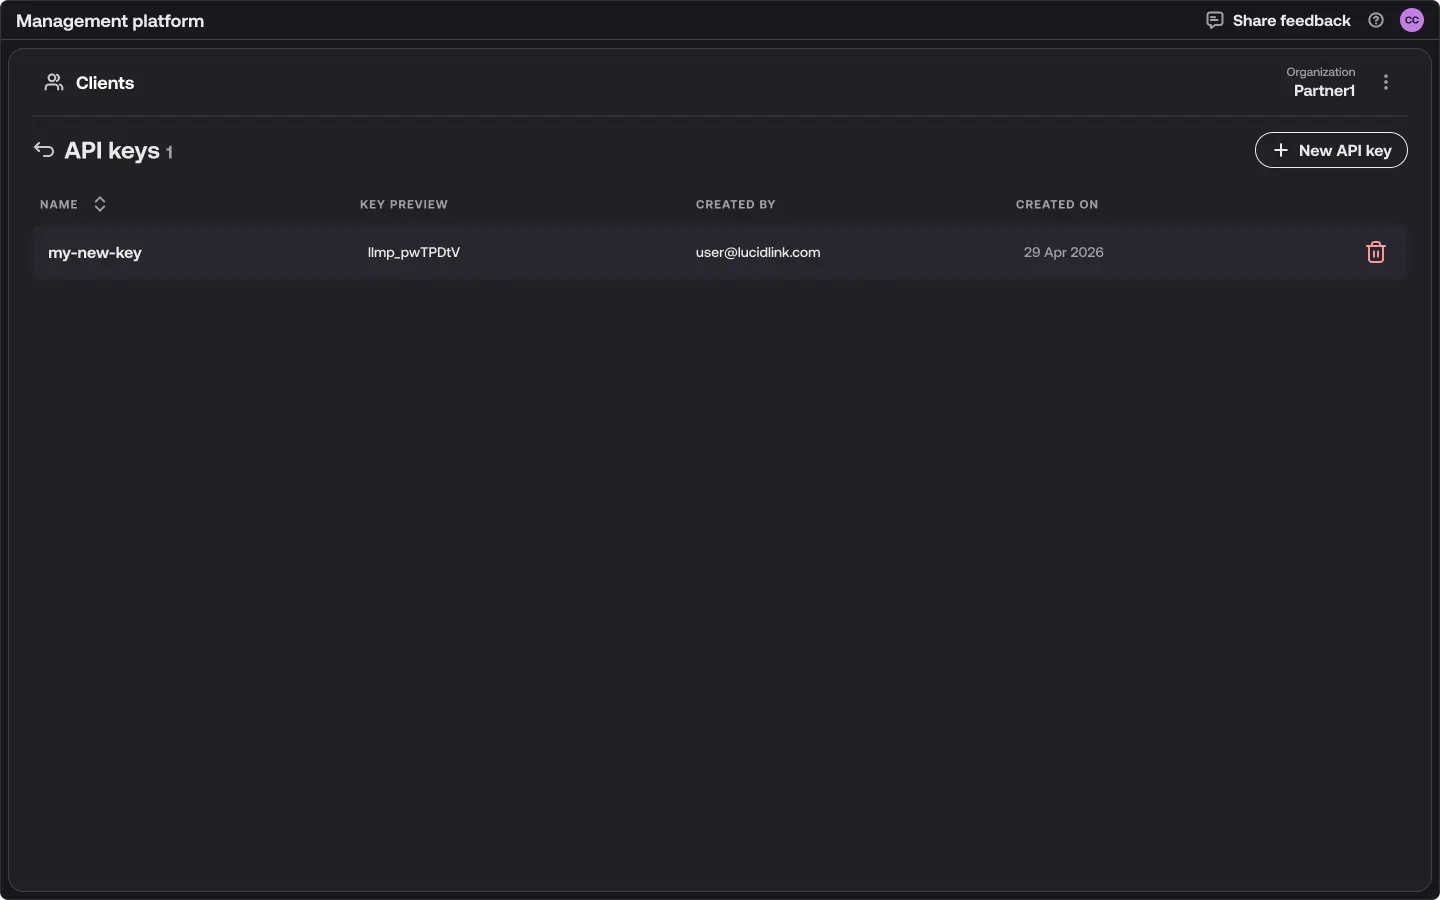
5. Check the key is listed
The key now appears in the list with a preview of its first characters, who created it, and when. The preview identifies the key in the UI — it is not the key itself and cannot be used to authenticate. Use the delete icon to revoke a key.
Use the key in a request
Every request carries the LMP API key in the Authorization header, prefixed with ApiKey:
Header format:
Authorization: ApiKey <LMP_API_KEY>A key that is missing or malformed returns 401. A valid key whose organization is not entitled to the API returns 403.
Make your first call
GET / validates the key and returns the partner organization it belongs to. Use it to confirm credentials before writing anything else.
Verify the API key:
curl https://lmp.lucidlink.com/api/v1/ping \-H "Authorization: ApiKey <LMP_API_KEY>"
GET / returns the same organization with its tier, status, supported billing models, and current billing period.
Read the partner organization:
curl https://lmp.lucidlink.com/api/v1/me \-H "Authorization: ApiKey <LMP_API_KEY>"
Response:
{"id": "org_01HZX...","name": "Contoso Managed Services","owner": { "email": "ops@contoso.example" },"tier": "msp","supportedBillingModels": ["prepaid"],"createdAt": "2026-01-14T09:21:00.000Z","status": "active","expirationDate": null,"billingPeriod": {"start": "2026-08-01T00:00:00.000Z","end": "2026-08-31T23:59:59.000Z"}}
Onboard a client
Creating a client organization takes a name that is unique within your partner organization, and an optional notes field of up to 200 characters. The response returns the new client's id.
Create a client organization:
curl -X POST https://lmp.lucidlink.com/api/v1/clients \-H "Authorization: ApiKey <LMP_API_KEY>" \-H "Content-Type: application/json" \-d '{"name": "Northwind Studios","notes": "Onboarded 2026-08-05"}'
The first member added to a client organization becomes its owner, and the owner cannot be removed afterwards.
Add the first member, who becomes the owner:
curl -X POST https://lmp.lucidlink.com/api/v1/clients/<CLIENT_ID>/members \-H "Authorization: ApiKey <LMP_API_KEY>" \-H "Content-Type: application/json" \-d '{ "email": "owner@northwind.example" }'